|
|
||||||||||||
|
|
|
Westchester Web Design |
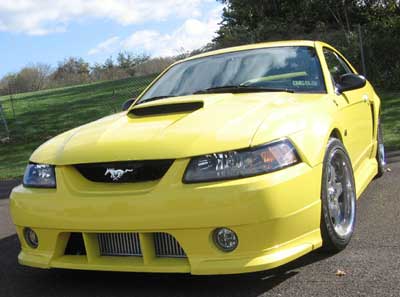
Custom Intercooler Install for a Vortech (or other centfrigual) Supercharger - Ford Mustang
StangNet member Stefan Weaver, like a lot of Ford Mustang owners, always wanted a safe, yet powerful motor. Intercooling a supercharger is one of the most efficient ways to safely produce respectable power figures. In a joint venture with Treadstone Intercoolers, he sought to produce a custom intercooler setup on his 2002 GT. After a safe tune was applied, the project turned an additional 65 RWHP and 30 ft lbs torque. Keep reading to get the step-by-step detail (straight from Stefan) on how this project was completed.
Disclaimer
This is not an instruction set on how to install your intercooler without flaw. I am not ensuring that these steps will work for every application, nor do I take responsibility for any faulty work done to your car.
Products Needed
1. (1)
2. (1)
3. (1)
4. (1)
5. Upgraded re-enforced silicone sleeves – www.ebay.com
6. T-Bolts to match your sleeves and connections –
www.intakehoses.com
7. (1)
8. (1) 4” to 3.5” rubber reducer - www.intakehoses.com
The Products
The intercooler – For this project I used a Treadstone Performance BMV25-O Intercooler. I used the vertical style intercooler because my research told me that these type intercoolers flow air better and loose less boost. I was extremely pleased at the cost and performance. I lost less than 1 lb of boost and the cost was more than easy on the pocket. I spent roughly $350 and feel it’s the best bang for your buck. I actually purchased an Ebay intercooler and it was poorly built, dented, and the customer service was not up to par. I have spoken to Treadstone Performance and still communicate via email with them about the intercooler. They are very easy to work with, which goes a long way.
The piping – I simple did a search on Ebay for 3” Intercooler piping and bought one that was reasonably priced. I believe it was 130 shipped and included a series of bends and straights. If I could purchase again, I would by more curves than straights. I ended up only using one straight out of the three supplied.
Bypass Valve – I originally bought an Ebay knock off of the Greddy Type-RS. After the installation was complete, I experienced nasty compressor surge, bypass flutter, and pipe bursting. The valve did not allow enough air to exit during vacuum and caused an issue while tuning. I instead purchased a Vortech Mini-race and the moment I installed it, the compressor surge was gone and so was the pipes blowing off. Definitely bite the bullet and spend the $275 and buy one.

The Project
Below are the steps I did to complete the project. The entire project took 3 weeks but if I had more time, and prepared everything, I could have completed the fabrication in one weekend. The welding of the pipes and tuning obviously depends on availability of the people doing the work.
1. I began by taking off the headlights, detaching the fog lamps, removing the bumper, bumper support, and the foam bumper.

2. I disconnected the IAT Sensor, MAF, and the excess air tubes going in to the inlet tube.
3. I removed the engine components such as the air filter and inlet tube, and discharge tube.

4. To re-clock the supercharger, you need a shortened Allen-wrench. I found the correct size and used my Dremel to cut down the insert end, leaving about ¾” left.
5. Using the newly cut wrench, unscrew all the bolts from the supercharger and remove the brackets that the bolts were holding. This should free up the unit and it should turn freely
6. Turn the supercharger unit counter-clockwise until facing towards the bottom right of the engine bay.

7. Re-install the brackets and bolts, leaving the bolts loose so the unit can move freely during mock fabrication.
8. Now that we have the supercharger unit re-clocked, we need to mount the intercooler.
9. I wanted a clean installation of my intercooler. Besides, you want to show of what you did right? With the bumper support in my basement, I help up the intercooler to the bumper support and used a market to outline my cuts. Using my Dremel, I cut the area that I marked with my market. It took roughly 20 blades to cut the steel so do not be worried that your blades wear quickly.
(Caution: Use eye goggles and mask. Metal fragments will be in the air during cutting and the fumes will make you pass out quickly.)

10. I went to Home Depot and pick up some thick bolts and nuts, along with some aluminum bars to use as supports.
11. I cut the aluminum bars to bolt on to the intercooler, and bolt on to the support beam. Using a drill, I drilled the marked holes and bolted the intercooler to the bumper support.
12. I found after installing the intercooler that the aluminum was flexing and allowing the intercooler to sway. I cut a horizontal piece of aluminum and bolted that to the support beam to prevent flex.
(Note: Depending on your installation of your intercooler, you may need to cut down your bolts to allow the support to be bolted on to the car.)

13. Mount the intercooler in place. Put the bumper back on to make sure you have enough space to route pipes, along with making sure the intercooler is level attractive. I had to lower my one end about 1” to make it level so it may take a few tries.
(Note: Drill multiple holes in your aluminum to allow for various heights. That way lining up your intercooler with your bumper is a matter of moving the bolts down or up a hole.)

14. With the intercooler in place, take the bumper back
off and start to eye up where you want your pipes to run. I ended
up opening the area where the air intake is to allow for more pipe.
I felt I would rather keep the pipes straight, than use a lot of 90 degree
bends to fit everything. I used a 3” hole saw to cut the new
area. Then I used a Dremel to make everything nice and pretty
15. Get some ¾” fuel line and slice the one
side, insert it in the area you just cut. This will allow you to lay
pipes on it without cutting the surface of the pipes. Trust me, if
you want to paint your pipes you’ll thank me. If those pipes
move on the freshly cut metal, you’ll be re-painting it again

16. Carefully cut sections of tubes and mock up your lines. Start from the supercharger and work to the intercooler, then from the intercooler to the throttle body. Remember everything is based on angles. If your supercharger is pointing 70 degrees down, and your intercooler is level at 0 degrees, you will need a 30 degree bend to make it level with your intercooler, than two 90 degree bends. The rest is just cutting your straight pipes to make it fit. If you think it that way, your fabrication will go a lot easier.

17. Using duct tape and a black marker, secure your pipes and make 2 lines for each pipe. Then reinstall your pipes to confirm your fitting is correct.
18. Drill holes for your IAT sensor, Excess air from the throttle body, and bypass valve flange.
19. Use a rubber bung for your IAT sensor or have your local shop fabricate you an aluminum ½” nut to weld in to place.

20. Cut some aluminum pipe for your excess air tube and tape it in to place
21. Double check all your connections, and fittings, and take it to get TIG welded. The welding will ensure you don’t loose boost because of crappy connectors, and will look a lot better. Ask your welder to make a lip, or dimple the ends of each pipe so they stay in the pipes under high boost.

22. Take your new pipes to the car wash and use the power washer to blow out any dirt and metal flakes. Get some long industrial springs and tie some cloths to it. Run it through all the pipes to dry them.
23. Re-install your tubes with your new re-enforced silicone couplers and t-bolts.
24. Double check all your connections and start the car up. It may idle a bit funny so don’t be worried. Check for boost leaks or bad connections.
(Alert: Do not get overly excited and rev the car. The car should never see boost until it is tuned)

25. Take the car to the tuner to get tuned. Have them double check all your connections, and installation.

26. Have fun!
Written
by Stefan Weaver: http://www.stangnet.com |