|
|
||||||||||||
|
|
|
Westchester Web Design |
Materials:
Water
Spray bottle
Dishwasher Detergent
Squeegee
Tape Measure
Electrical tape
Scissors
10mm nut driver (If you want to remove spoiler)
Another human
1.) First thing you want to do is wash the car real good, and if wax is on there make sure its removed.
2.) Now I did mine in the garage with plenty lights on a warm day, I wouldn't suggest doing it on a sunny day if your going to do it outside, but I would do it on a warm day, 60-90 degrees. Do not park where leaves or a lot of pollen would land on your car, it will get annoying to keep it clean. Have everything setup and ready, have a place to keep cutting pieces easily, have spray bottle ready and squeegee.
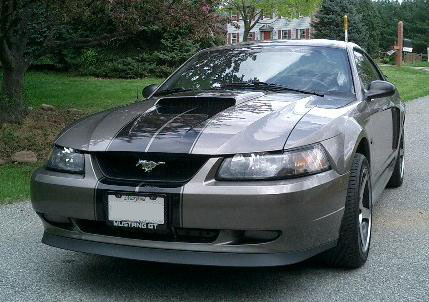
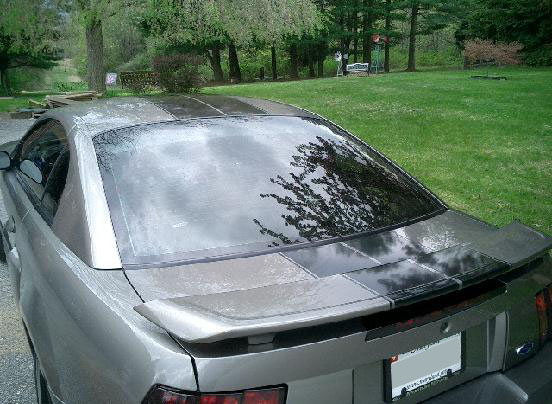
3.) There will be 7 sections of striping for 99-04, 1 front fender, 3 on hood, 1 roof, 1 trunk, 1 spoiler.
4.) I started with the hood, the section in front of the hood scoop. You have to find the center of the car, measure the end of the hood on both side to find center (I marked everything with electric tape, it wont harm anything, should be right after last hair on top of horse emblem) I took a couple measurements from different spots to make sure I had center (Do the start of the hood and the middle, its not square remember) Depending on your gap, I'm going to go off of the gaps I did, I think that I chose a good gapping. When you find exact center, pick whatever side you want to start with, measure 1/4" to the right and left and that's where the edge of the stripes will be (that gives you your 1/2" spacing) Mark these spots with at least 4" of tape so when you put the stripes on, the edge of the stripes should line up with the edge of the tape. I put 3 pieces of about 4" up the hood, this gives you a line to go off of so the stripes are straight.
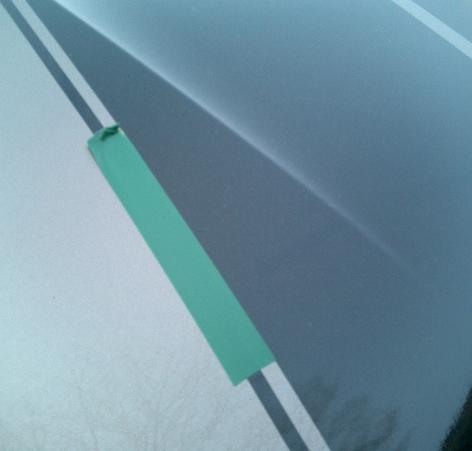
5.) Now you have the measure for the length of the stripe. I went from the honeycomb that's in the hood scoop down the the end of the hood, plus 1", its about a 28 1/2" cut. Make sure to cut it straight, flip the decal over and mark a straight line on the back, and cut it. Now add the dish detergent to the spray bottle, a lot goes a LONG way, its the best stuff to use, slimy and it makes it easy to work with the decal. Spray the area that the decal is going on the car and SPRAY YOUR FINGERS, keep your fingers wet or the decal will not want to stick with your oil hands touching it, do not be afraid to soak the car with the soapy water, the decal will dry and stick. Have a friend peel the decal with THERE HANDS SOAPY also, as your peeling it spray the decal, DO NOT peel fast or hard because you will stretch the decal. MAKE SURE the decals sticky side does not touch itself, you do not want any wrinkles.
6.) Now the car is soapy, your fingers are, and the decal is, place the decal on the car, and you'll see its easy to work with, position it with the edges lining up with your tape marks to get it close.
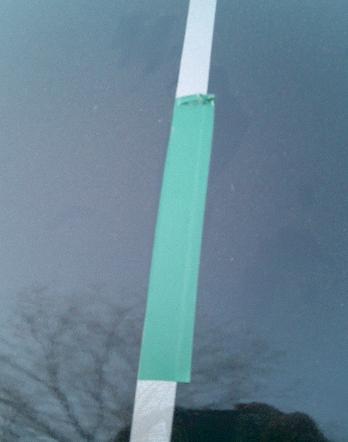
7.) Most times decal place will send you a plastic squeegee which I used and it worked great, BUT DO NOT TOUCH THE PLASTIC TO THE DECAL, IT WILL SCRATCH! Take electrical tape and tape the end that will touch the decal so its electric tape touching it NOT plastic, and BEFORE you start using the squeegee spray the top of the decal with soapy water also, prevents scratches/streaks/rips.
8.) Now the decal is lined up, once you start using the squeegee the decal will start sticking, make sure to get all bubbles out now, or you never will. I went from center of decal to the side to get bubbles out, make sure the decal is still lined up with the tape so that your straight. when doing the hood, slide the decal under the honeycomb scoop so that it looks like it keeps going under it, and at the end of the hood just push up against the decal so it looks like it goes under the hood
9.) Keep working with the same stripe until all bubbles are worked out and its straight, keep adding soap to the top of the decal if needed, the more the better, take your time it will be worth it, make sure its straight and bubble free before moving on. now do the other side.
10.) After that I moved on the the front bumper, this was the absolute hardest part. Remove front license plate. Find center and measure your length of cut, use tape again to keep the decal straight, about 11" cut here. It is hard to get all bubble and wrinkles out of this one, use plenty of soap. Apply the decal shoving some of it under the (if you have mach 1 delete kit put it under black plastic part under horse, I forget the setup if you don't have it but just make it so you don't see any cuts) and some should go under the bumper so you don't see the cut. Again this piece if very hard to make look good but keep using soap and keep working with it, this will take some time. You have to keep working with the stuff, trust me you can get all bubble and wrinkles out, use the squeegee carefully, NOT TO HARD. I didn't do the little part where a mach 1 chin spoiler connects to. Now do the other side.
11.) Next I did the scoop, fairly easy. Measure from where the hood meets the scoop towards the rear of the car, and go to the end of the scoop, add 1". Using all the soap like before apply decal, try and slide the decal under the scoop in the rear so it looks like the scoop is wrapped in the decal, and in the front tuck it up so you do not see the cut, about 18" cut here. Make sure you find center also, with this one you can apply it and have a friend see if its lined up with the stripes on the front of the hood. Make sure its straight and bubble free.
12.) Now finish the hood, the little section in the back. About a 6.5" cut here, remember to measure where you see the cut will be LONGEST. Here you will want to slide the stripe under the hood scoop, and put it down past the back of the hood, again to see no cuts! You don't really have to measure here to be center, just apply it: Remember to use plenty of soap, the car, both sides of the decal, and your hands.
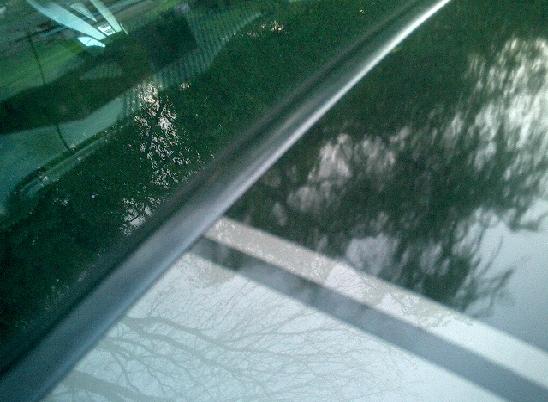
13.) Next I did the roof, this was the easiest part. Find the center, using the front window, get exact center and REMEMBER go 1/4" to the right or left to leave spacing for the 1/2" space because that should be center of the car, not the decal. Now find center of the rear of the roof using the rear window, (the roof isn't square), use tape to mark. When taking length measurement, measure from rubber to rubber and add about 1" because your going to slide the decal under the weather stripping so you do not see any cuts, that's the key not to see any cuts at all. I think its about a 41 1/2" cut, using soap on car, hands, and the decal, apply the decal, and work out the bubbles REMEMBERING to use soap on top the decal also, make sure your all lined up and make sure the slide the decal under the weather stripping on the front and rear. Notice the decal going under.
14.) 2 more pieces. I took the spoiler off to make the trunk easier, 4 -10mm nuts, takes 30 seconds to remove and makes life a little easier. Now find center of the trunk, remember don't just go off of one measurement, do a couple to make sure your center. Now measure length, remember do the LONGEST part of the stripe as the measurement for your length, cut it long if you have to, you can always cut some off. Here you want to roll the decal under the trunk, and push the decal with a knife or something down where the 3rd brake light is, again to see no cuts.
15.) Put the spoiler back on and I didn't find center here, I lined it up with the stripes on the trunk, and the key hole for the trunk is center so I made sure that was lined up also, the spoiler is a little tricky to do, use plenty soap here, and almost, if not completely wrap the spoiler, work with this one for a while, I had to to get all the bubbles out, make sure your straight and remove all bubbles. I had to cut a slice in the decal here to remove the bubbles so you might have to cut a slice or two in it, but now its not noticeable so you will be ok.
16.) If you got the pin striping, which I recommend getting, I didn't like it to much without it, just have your friend hold the pinstripes while still using plenty of soap and water, apply it next to the stripes, making sure your 1/4" away, its very easy to do this, apply it like you did the stripes, so you see no cuts, make sure your 1/4" away the whole length, use plenty of soap so you can work with it, you can use your finger here to remove bubbles, i didn't use the squeegee on the pin striping
17.) ALL DONE, wipe away all the soap, this is why it shouldn't be in the sun because soap will sit on your car for a little while. Go back and make sure the decal hasn't popped up anywhere, sometimes it wants to on the edges, just go back and make sure you got it all, if you reuse the squeegee, put MORE soapy water on the decal so you do not scratch it. Remember if you did one part and it didn't want to stick, let it sit and go back to it, it will stick as it gets a little dryer. Also the decal will shrink a tad after completely dry, this is why you want plenty of decal. Hopefully your all lined up, and you shouldn't see andy cuts, take your time, its not the easiest thing to do in some spots, but for under $50 it gives your car a whole new look. Be careful dealing with the decal, don't wrinkle it or stretch it, use plenty soap on top so you do not scratch or streak it. Took me about 4.5-5 hours to complete.
Anymore questions just post or pm, ill be glad to answer, rather post it so everyone see's the question and answer. Its hard to explain how to do it, hopefully this really helped, it almost took as long to right it up as it did to do the stripes. I have plenty pictures and can take more if anyone wants a picture of a certain spot, thanks for reading.


Found @ moddedmustangs.com
Written by: RC02GT